Today I am going to show you how to use your colored pencils with a product you probably already have in your home. And it probably only cost you a dollar or two for 16oz. What is this mystery product? Drum roll please .... Plan old Rubbing Alcohol. Yep, Alcohol. It dissolves the wax in your pencils without damaging them or leaving any residue. It also drys quickly and allows you to work back over your drawing or stamped image quickly.
You might be thinking " Okay, Eric, that's great and all but what can I do with it and how am I supposed to do it?"
My answer, "Good Question." Your reply "Thanks".
Let me show you.
Because you can use alcohol to dissolve the vehicle ( the wax ) that carries the pigment ( the colored bits ) in your pencils this opens up a wide variety of tools you can now use with your colored pencils and a huge range of possibilities. For his demonstration I will stick to a few basic tools. Ones that you will see me use often in future demonstrations.
Here are a few of the tools that you might already have floating around and the ones I will be using.
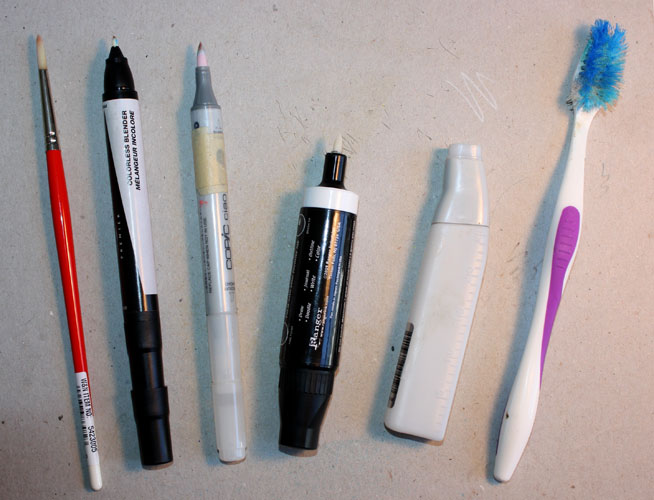
They are a round #5 paint brush for acrylics, Two different brands of colorless alcohol marker blenders (one of their names starts with a "C" and ends in "opic", a Adirondack's alcohol ink fillable pen ( very handy ), a Refill bottle for a colorless blender from a maker company that starts with that letter C, and last but not least a well used toothbrush.
First chose the image you want to work with and stamp, draw or print off two. Pick the one you want to make a mask from and cut it out. Remember the better the job you do cutting out your mask the better your results will be.
Using either your refill bottle of colorless blender ink, ie alcohol. Or a small container filled with Rubbing Alcohol. Dip the end of your old toothbrush into the alcohol. Here is the important part. You don't need a lot. Just enough to wet the bristles should be enough.
Now on a scrap piece of paper start rubbing the sharpened end of you pencil across the end of the toothbrush. Going away from you is best if you don't want to wear whatever color your using. Try changing the angle and distance away from the paper that you hold the toothbrush to see different effects. Once you're comfortable with how it works place the mask over your image and applying the color to it using toothbrush. The results should look something like this.


Next you can use your paintbrush dipped in alcohol to paint with. There are two ways to do this. One is to color in an area with your pencils and then wash over it with the wet brush. The other is to rub the wet brush over the sharpened end of your pencil loading the brush with color. Both techniques work great and I used both in the next pictures. If you look closely you can see the brush strokes created by the washes and daubs of color created by loading the brush with color from the pencil.


Remember at any point once the alcohol has dried you can go back and color over it with your pencils. This is what I did with the tan color in the picture above.
In the next series of pictures I will use my pencils to color in different areas on the car, boy and dog using one or the other of the blending markers to blend the colors together and to fade them out to white. I will also work back over these areas with the pencils building up different layers of color to create more depth.
In this picture I started with a ochre base color for the whole box.Then I applied red to the edges and corners. Using a blending marker I mixed the two colors together.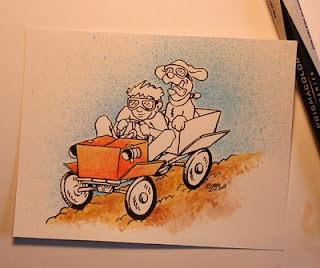

Here I added some more red with the pencils and blended it together using the brush tip of the Copic blender ( ha! I bet you thought I wasn't going to say it did you! ha! ) The Copic's brush tip gives you a looser blend.

Here using grey and one of the blenders with a firmer tip I have colored in the wheels and goggles while adding some shadow to the boxes. The blenders with the firmer tips seem to work best for fading colors to white.

And finally using the various techniques above is the finished image.

I hope you enjoyed this demo and found it useful. If you have any questions drop me a email.
Thanks
-Eric